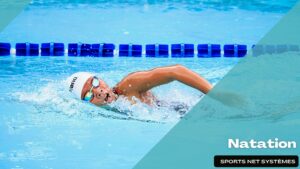
An efficient freestyle is built on good body position. The way we float in the water is affected by our core tension. For a better freestyle, we must learn to shift weight forward, and achieve a downhill floating position. The goal of the following drills for body position is to experience an advantageous float and effective core stability.
 Downhill Float
THE PURPOSE OF THIS DRILL
- Learning to shift weight to achieve a downhill floating position
- Understanding the importance of a correct head position
- Feeling effective core tension and stability
HOW TO DO THIS DRILL
- Step 1 : – Float face down in the water, with your arms at your sides, in a head leading position. Don’t attempt any forward motion.
- Step 2 : – Notice your body position. For most people, the legs will soon begin to sink, leaving the swimmer in an uphill floating position.
- Step 3 : – To begin correcting this disadvantageous floating position, lower your chin, so you are looking at the bottom of the pool, not forward. For many people, this simple action will have a positive effect on their float, including raising their sinking legs a bit.
- Step 4 : – Now focus on your spine. Make it as straight as possible by contracting your abdominal muscles and pulling your bellybutton in. Learning to achieve and maintain a straight spine through core tension is an important skill that can be applied to all strokes.
- Step 5 : – While holding your core stable, lean forward on your chest. Doing so should allow your hips and legs to rise toward the surface of the water. This is the desirable downhill floating position upon which you can build a good freestyle.
- Step 6 : – Stand, breathe and again lay horizontally in the water, face down, this time with your arms extended over your head, hands leading. Look at the bottom of the pool, achieve a straight spine and stable core. Shift your weight forward and feel the downhill float.

DRILL FEEDBACK CHART
| Problem | Modification |
| My legs still sink. | For some people, either because of densely muscular legs, or low body fat, their legs will tend to sink no matter what. For these people it is all the more important to learn to hold their core in a downhill floating position. |
| I can’t balance on my chest. |
Try rotating your shoulders back, and rounding your chest out. Pretend you are standing at attention horizontally. Focus on your breastbone, moving it gently lower in the water. |
| I can’t breathe. |
This drill requires you to hold your breath. When you run out of air, simply stand up and start again. |
 Log Roll
THE PURPOSE OF THIS DRILL
- Maintaining the horizontal axis while rolling
- Accessing power from your core
- Getting comfortable floating downhill in a non-flat position
HOW TO DO THIS DRILL
- Step 1 : – Float face down in the water, arms at your sides, head leading, without attempting any forward motion. Achieve a downhill float and position your head so you are looking at the bottom of the pool.
- Step 2 : – Maintaining your core tension and head position, roll onto your right side by rotating your right hip and shoulder one quarter turn clockwise. Hold for 5 seconds.
- Step 3 : – Maintaining your core tension and head position, roll onto your back by rotating your right hip and shoulder one quarter turn clockwise. Hold for 5 seconds.
- Step 4 : – Maintaining your core tension and head position, roll onto your left side by rotating your right hip and shoulder one quarter turn clockwise. Hold for 5 seconds.
- Step 5 : – Maintaining your core tension and head position, roll back onto your front by rotating your right hip and shoulder one quarter turn clockwise. Hold for 5 seconds.
- Step 6 : – Stand, breathe, then repeat this drill rolling counter clockwise.
Log Roll

DRILL FEEDBACK CHART
| Problem | Modification |
| I can’t get a quarter turn. | Try initiating the turn from the hip and letting your shoulder follow. |
| My sinking legs get in the way. | You can do this drill with a very light kick if necessary. |
| I can’t breathe. | You can catch a breath when you rotate to your back. |
 Twelve Kick Switch Freestyle
THE PURPOSE OF THIS DRILL
- Maintaining a downhill float while moving
- Beginning to feel leverage from the core
- Identifying the longest freestyle position
HOW TO DO THIS DRILL
- Step 1 : – Float on your side in the water, arm towards the surface at your side, the arm closest to the bottom of the pool extended over your head. Engage core tension to achieve the downhill float.
- Step 2 : – Begin a gentle but continuous flutter kick, which should also be directed side to side, rather than up and down.
- Step 3 : – If you are properly aligned, your face will be mostly submerged. To breathe, maintain a stable head position and roll towards your back, breathe, then roll back to your original side position. Create a regular breathing interval.
- Step 4 : – Kick twelve times (each leg equals one kick).
- Step 5 : – Just as you finish the last kick, bring the side laying arm over the water to the front, and the forward reaching arm through the water to your side. At the same time, switch to the opposite side of your body to float.
- Step 6 : – Do twelve more kicks in this position. Repeat the switch with your arms and floating side. Continue to kick twelve times then switch to the far end of the pool.
Kick Switch

DRILL FEEDBACK CHART
| Problem | Modification |
| I go crooked. | Try to align your body and reaching arm. |
| My kick is not side to side. | This is usually a result of your hips not being aligned to the side with your shoulders. Use more core tension. |
| I can’t maintain a downhill float. | Check your head position. During the tw elve kicks, your lower ear should be resting on the shoulder of your reaching arm. |


